Comments
You can use your Mastodon or Fediverse account to reply to this toot!
 F1RUM
F1RUM
Since I can’t make any more progress in learning Morse code with the Koch method, I’m trying to learn in a different way by doing something that is not recommended: generating Morse code when I can only decode it with difficulty. I don’t know where this will lead me and I don’t recommend this to anyone at the moment. I am experimenting!
For that, in order not to clutter the radiowaves, I took the option to acquire an autonomous keyer on which to plug my key. Moreover, I know that it will be useful with my QRPVer transceiver which only manages the semi-automatic mode. And if I have to learn to send Morse code, I might as well learn in a mode that will be more efficient later. I choose the iambic mode B.
After a lot of research and help from Jason on Mastodon, I chose the Pre-assembled Ultra Picokeyer from HamGadgets. Received a few days later, with an additional 20 € custom fee.
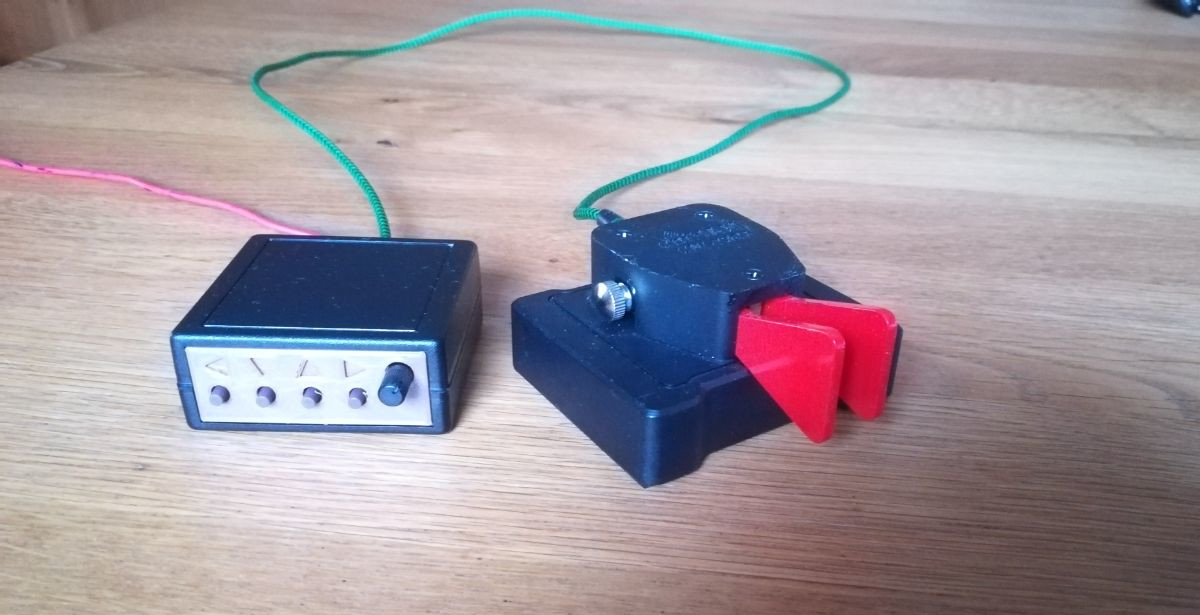
As you can see, this keyer is really small, it will be ideal for field operations.
Here are the points that made me decide to choose this device:
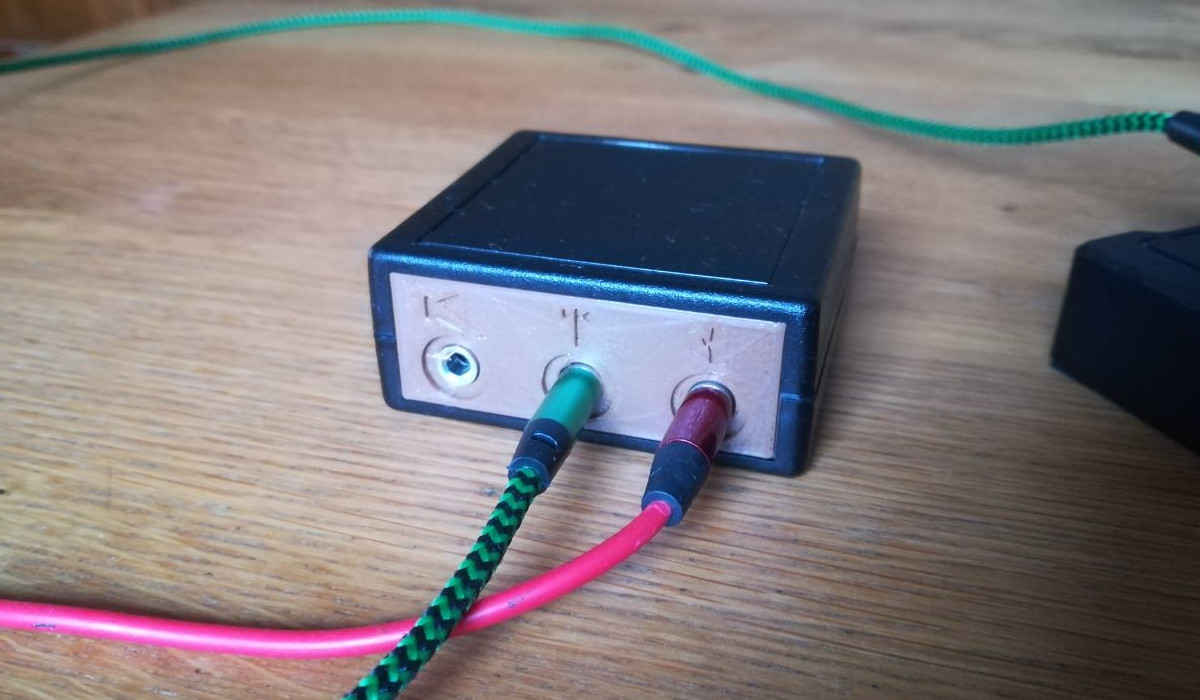
It has three 3.5mm jack ports for the key, the transceiver and an audio output.
Some drawbacks though:
The buzzer emits a rather high-pitched sound, 2000 Hz, far from the usual practice in radio (between 500 and 800 Hz). This frequency is adjustable, but becomes inaudible in these low frequencies.
In iambic B mode, the simultaneous release of both paddles does not always react as expected, it seems quite sensitive and sometimes reacts as if one paddle was released first or the other. Other keyers are more tolerant and detect that you have released both paddles at the same time and act accordingly. This forces you to choose which paddle to release first, which is not necessarily a bad habit to get into.
I hope that learning how to send Morse code will help me progress in decoding as well.
To be continued!